Saturday, May 5, 2012

Good bread

This morning, I am making some bread and thought, hey self, let's take pictures and blog about it! I feel like I run out of things to talk about on my blog, and therefore, don't do it consistently. But, what an opportunity this morning!

This bread I found here and I love it. I have made it about 3 or 4 times and have loved every loaf. I made it with whole wheat flour, with cheese and lemon and rosemary, or just plain. And it's just plain good! And easy, hey!

I love this recipe because technically the bread is soaked. I want to experiment with soaking it with part water and part kefir, just not sure how it will taste. And since I am sharing this bread with dinner guests, I thought now is not the time to try it, in case I kill them or something.

And, I get to use my awesome and fabulous cast iron dutch oven. Which I seriously use with every meal. Seriously! :) It's huge and heavy and well seasoned and just awesome. I make stock, soup, pot pies, braised meat, and bread in it! It's perfect for those "one pot meals." If you don't have one, get one man! I envy those who have the bright colored, beautiful Le Cruset ones, but I don't feel like dropping $300 on one right now. I bought mine a few years ago from HomeGoods for $60 and it is a Wolfgang Puck brand. It is 7qt. Dang! What a deal :)

Why am I talking about cast iron? I thought I was talking about bread. Okay, okay, here is the recipe.

Recipe:
-3 cups flour (White, wheat, spelt, rye, whatever your heart desires. I mix mine sometimes for fun)
-1 3/4 tsp salt ( I used celtic sea salt, mmm)
-1/2 tsp yeast
-1 1/2 cups warm water

Mix the dry ingredients in a large bowl. Add the water and mix well. Cover the bowl with plastic wrap and leave overnight. When ready to bake, preheat oven to 450. Turn dough onto a well floured surface and shape into a ball, cover and leave will the pot warms up. When the oven is hot, place pot inside and heat for 30 minutes. Place bread inside pot and place lid on;bake for 30 minutes. Remove lid;bake for another 15 minutes. Remove bread and cool on wire rack.

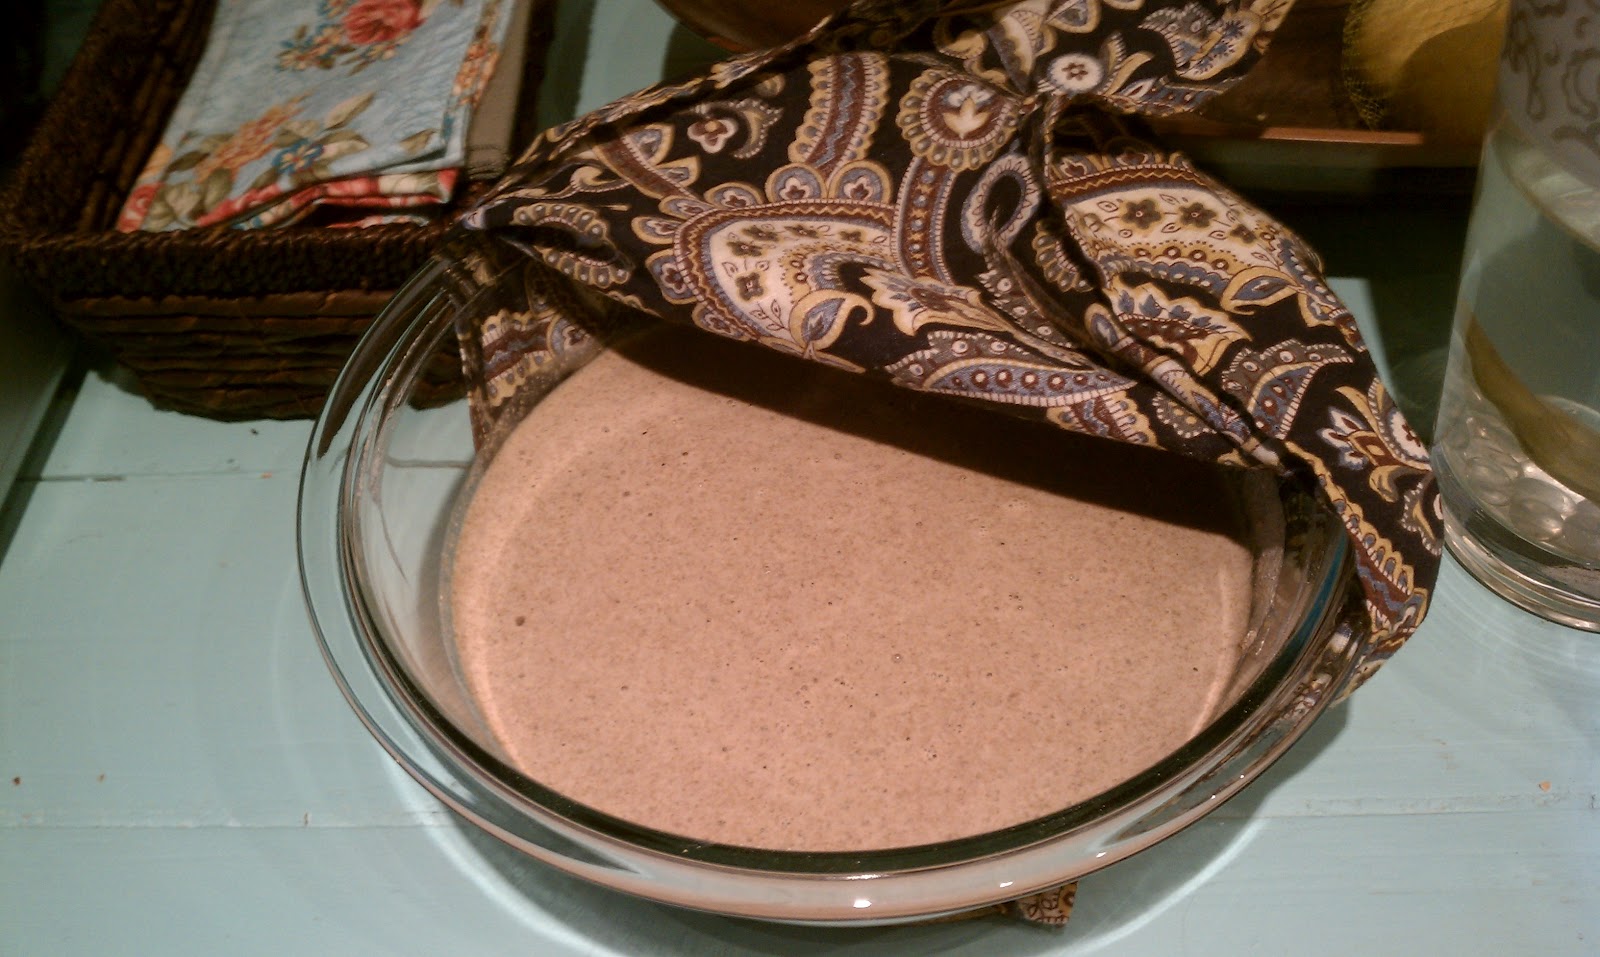
While soaking the bread overnight, I used to set mine on the carpet by the heater, since my kitchen counters are granite and cold! But last night I left it in the microwave and it turned out fine. It looked like this.


When you are ready to bake it the next day, turn on the oven to 450. While the oven is warming up, take the dough and dump it onto a floured surface. It will be sticky, like this.
You can flour your hands too, because it's stick-aay.

Form the dough gently into a ball. Then use the same plastic wrap and cover the dough while the oven is warming up. No need to be particular on the time.


When the oven is hot, place your pan in there for 30 minutes to get it nice and hot! Please ignore the fact that my oven looks horribly dirty. Thanks flash for exposing my dirty oven. It looks cleaner when the light isn't on :)


When its nice and hot, CAREFULLY take out the pot, which seriously weighs 30 pounds and drop the dough into the pot. I sprinkle just the tiniest bit of cornmeal on the bottom first, just in case it sticks, which it hasn't yet.


I clearly wasn't looking as I dropped the dough, heheh. It landed on one side of my pan. Ah man! But it is too sticky and hot to mess with it, so I'm going to call this bread artistic artisan. ha!


Place the lid carefully on the pot and put in the oven for 30 minutes. You must use a pot/pan with a lid so it can steam bake. After 30 minutes, take it out. Remove the lid. It will look like this


Just imagine it centered and prettier. That's what it should look like. This is art, remember?

Leave the lid off and bake for another 15 minutes. When it's done, remove the bread and place on a wire rack to cool. Enjoy!

What a beauty! Golden and crusty bread.


Thursday, May 3, 2012

Kombucha

I realize I am blogging twice in one day. Whoa, now. I know, it's really crazy. However, this subject deserves a post all to itself.

Kombucha.

Remember I started brewing it? Since my first try was a flop, I tried again with a new scoby. And it was a success! It was wonderfully sweet. A little too sweet, but I will get it down soon. And it's lovely to drink when you want something fizzy and sweet, instead of a soda. I can see myself drinking this all summer, sitting on our porch and enjoying a cool summer breeze. It will be much classier than last summer when Erin and I sat on our porch drinking a cold beer after tiling some of our kitchen floor, and by sitting I mean we were sitting on metal chairs we found in our basement next to our toilet and stove/oven. Because naturally everyone has those on their back porch. hehehe. We were tiling our bathroom and kitchen at the same time and it looked like a dump yard. So, kombucha=classy :)


I started this time with a new scoby. I used a gallon of filtered water I bought at the store. I used organic black tea bags. I sanitized my jar with vinegar, no soap. Soap is bad for the scoby. I also added a splash of vinegar to the tea mixture to give it a little "Umph"

If you have looked at kombucha recipes online, you will find there are roughly, I don't know, 6,479. Just kidding. But seriously, no 2 are the same. So I will just let you know what I did.

What you need:

-1 gallon size glass jar. Just use glass, don't risk metal or plastic not working right. ( I bought mine from Target for $18 and it has a spout at the end which is PERFECT for bottling the tea).
-8 organic black tea (don't use Earl Grey)
-1 cup organic white sugar  (the yeast with work best with the plain, bad for you sugar)
-vinegar
-cloth and rubber band
- almost forgot this one, the SCOBY! (symbiotic colony of bacteria and yeast)
-100% pure juice of some sort, I used pomegranate 

Here is where I bought mine.

Step 1.
Pour the filtered water into a stock pot and bring to just below a boil. Turn off the water and add the sugar. Stir to dissolve. Then, add the tea bags. I hang all the tags by the handle so they don't float around. 

Step 2.
After an hour, take out the bags. Let the tea come to room temperature. I leave mine overnight and in the morning I pour the tea into the glass jar. Make sure the spout is turned off. Not that I'm speaking from experience or anything. Really make sure the tea isn't hot or it will kill the good bacteria of the scoby, be patient people!

Step 3.
Add the scoby to the tea. It will sink to the bottom. Add any liquid that was being stored with the scoby. If you don't have at least a cup of the liquid, you can add a teaspoon or two of vinegar. That's what I did. It just helps it get going. A little somethin somethin.

Step 4.
I place one of my homemade napkins over the top of the jar and secure it with a rubber band. You want it to breath but don't want any nasties to get inside. That is the mistake I made the first time I brewed. I used cheesecloth and a few days later I had fruit flies floating on top. Then mold. Yikes!

Step 5.
Leave it alone. Give it some space man. Let it work it's magic! This was hard for me. I would sit in front of the jar each day and use my flashlight app on my phone to look inside it, without really touching it of course. Kombucha can take 7-14 days to be ready. Do your own research and see what you think. Day 7 might be super sweet and day 14 could be super sour. So, taste it often after day 7 and see if you want to stop.

Now here is where you just experiment with it. After 8 days, I tasted it. It was a little scary, since it looked like this. Don't worry, this is only the top. I poured some out of the spout.

I could see lots of teeny tiny bubbles floating to the top and boy was I excited! It was carbonating all on its own! The scoby was at the top and had formed another film at the surface ( a baby scoby). So i bottled it. I filled the bottles about 80% and added 100% pomegranate juice to flavor it. Then, I placed them in a container in my pantry and covered them with a towel (in case they explode) for 3 days. Then, refrigerate, and drink! Be classy :)

Before juice
After juice, you don't need to add very much.

I placed them in this tub and threw a towel over the top, just to be safe.

I feel like I could have let them sit out another day or 2, since my pantry is a little cool. And this batch I'm doing now, I let it sit for 10 days before I bottled it. Now they will sit in my pantry for 4 days. We shall see.

What do you do with the scoby and tea left in the jar? I'll tell you! I have been doing a continuous brew. There is less risk for contamination that way. So, I leave a cup or two of the tea and scoby in the jar. Then, start over with brewing more tea, letting it cool and add it back to the jar. Start over with brewing it for a week or so. If you want to stop, save a cup of the tea and the scoby in a glass jar. Just make sure your hands are clean before transferring the scoby.

Want a scoby so you can make your own?? I got one for ya!


Napkin Tutorial

I got bored yesterday, since I woke up at 730 and didn't work until 12. So, what's a girl to do? After I made myself a pot of coffee, took a shower and read some blogs, for I don't know, an hour or so, I decided to make napkins of course.

I bought this fabric a few weeks ago with a friend and thought it would make super cute summer napkins (So glad my husband doesn't mind that they are uber feminine. He just likes that I serve dinner along side them :))

So, I thought it would be fun to show you how I make them. I totally got this from pinterest. Because that's where you get stuff like this. The original tutorial I saw this from is here.

You start with a a fabric square 21"x21". I made 4 napkins, because I forgot that I wanted to make 6 and only bought enough fabric for 4. (only a great excuse to go to the fabric store and get more)
Turn the fabric so the right side is down and make sure its ironed well. Then fold each corner in 1 1/2" and press. I love to use the steam setting for these napkins.

After all four corners are pressed, cut off roughly a 1/2" or so. No need to measure.

Then, fold one side of the napkin over about 1/2". Use the steam to get a good crease.

Fold it over a second time, one more 1/2".

Pin a few inches apart to hold in place.
Repeat with the double folding one side at a time, matching up the corners as best as possible. Clearly, mine are not perfect. I was going to take a picture of a perfect one but I forgot. So now you know I'm not perfect, secret's out!

When you have your napkin all folded and pinned, it's time to sew! Choose a thread that blends in or stands out! I chose a beige because I already had it set up with a filled bobbin :) And it just so happens to go well. Go nice and slow, sewing fairly close to the inside edge of the fold. When you get to a corner, go slow and stop with the needle in the fabric. Then, lift the foot and rotate the fabric.

This is with the foot up after I turned the napkin, sort of hard to see but keep the needle in. Then lay the foot down and keep sewing all the way around, repeating that at each corner.

After you sew the inside seam, repeat the same way with the outside seam. I just followed the fabric with my foot, about an 1/8" from the edge.

It should look like this when you are done!

Again, you can see my corners are not perfect :) But I love making napkins! You should make them too!
So we only use cloth napkins for meals. I feel old fashioned and green at the same time. And when they get dirty, I throw them in the laundry with the rest of the clothes. I hope you have endless napkin making fun.


Tuesday, April 17, 2012

Ham Pot Pie

After my guests on Easter left, I was left with roughly 3/4 of my ham! So. much. ham. So what's a girl to do? Look for left over recipes. Last week, we make eggs with ham for breakfast, split pea soup with the ham bone and ham chopped in it, and then I froze some. We also had just left over scalloped potatoes and ham for a few lunches. Ham ham ham.

I just recently found this recipe on pinterest for Ham Pot Pie, and made it last night. It will be a regular dish from now own. I already love to make chicken pot pies, and although this is topped with biscuits instead of dough, its fabulous.

I won't enter the recipe, since you can click on the link above, but here are some yummy pictures.

I sauteed all the veggies : potato, peas, corn, carrots, celery and onion in butter.

Transfer to baking dish.

Biscuits made with fresh parsley. I will definitely be making these again, and will be good and soak them first. Next time :)

This was after I added the biscuits, which I just formed by hand, instead of rolling them and cutting them.

And this was the finished product. It was delicious! 

This meal was made out of everything I already had in my fridge/pantry. Now that is something I can appreciate! Let me know if you try it :)

Monday, April 16, 2012

Monday, Monday

Today I have big plans and aspirations, I think. But when I try to remember them, I forget them and think of something else. This could be due to the fact I woke up at 6am this morning, on my day off, to make Erin his coffee and kiss him good-bye. He is going out of town for a few days.

This is exciting and sad at the same time. Mostly only sad because he won't be going to yoga with me tonight. And sad because I don't really like to cook when he isn't home to eat 75% of it and all the leftovers. Which makes this exciting because then I have an excuse to just go out and get me some chipotle or a deli sandwich for dinner instead :)

This morning, while drinking my coffee, I finally signed up for Farm Fresh To You, an organic produce delivery system they have in the area. I was debating doing this since last year, but over the summer I hardly cooked. I did other fun, laborious things like paint my house from head to toe (which I know houses don't have, just go with me), tiled my kitchen floor and bathroom, picked out sinks, and faucets, and hardware, installed pretty glass door knobs, sanded walls, caulked gaps in things, puttied walls, taped trims, washed paint brushes, handed my husband tools, and used my cute pink cordless drill. So, anyways, this year, now that my kitchen is put together and I have more time on my hands, I've signed up for it! This is exciting. Not only is everything locally grown, it is organic and it gets delivered to my door!!! Amazing.

Now I don't have to drag the kids with me to the grocery store to get expensive organic produce for dinner. Haha, just kidding. I guess this makes me lazy since I won't be needing to leave my porch to get the fruits and veggies. And for the record, I have no children yet. So, I am lazy sometimes. Anywho, the box I picked is a regular sized box, it is $31.50 and I have it scheduled for every 3 weeks. I did 3 weeks because I can't wrap my brain around spending $63 a month on fruits and veggies. And there is no way that would fly with Erin, lol, so we will try every 3 weeks.


You can select all kinds of things you don't want to ever be put in your box. I really only selected a few things, since I am looking forward to the challenge of getting things I have never seen, eaten or made before and having to come up with something! Sounds fun :) I selected bok choy, dandelion, and something else. Just because.


I have been making my own bread for the last few weeks, and feel like I am not spending as much lately at the grocery store. Not that I spent a ton of money on bread, but kinda! I buy sprouted whole grain bread, for toast and what not. Sourdough english muffins, for egg sandwiches. A loaf or two of sourdough bread for dinner. Then, maybe tortillas occasionally. All of this things I can now make myself. Which is awesome. Just a few weeks ago, I was spending about $80 at Trader Joes, maybe another $20 on things from Safeway that TJ didn't have or that was better to buy in bulk, like tp and paper towels, cotton balls, etc. Then I would occasionally buy my milk, eggs and other fun things at the natural foods co-op. Yikes! This last week, I think I spend about $50, total. I have been buying more things in bulk, and making my own breads. I don't imagine cutting down my bill that much every week, but it is fun and challenging to keep a budget.
I felt bad after buying all this, because I used so many plastic bags. Maybe I can start re-using the bags? They weigh the contents so I can't bring any containers or anything. Any ideas? Make my own, ya ya I know :)


I currently have my second batch of kombucha tea going, since my first batch was a hot mess. I believe I learned a few valuable things, though. Such as: Don't use half a scoby, don't use tap water, don't use cheese cloth. So, I will try try again. I have it sitting by my heater because I know my kitchen/counter is too cold for it. Its like baby. Is it eating enough? Is it too cold or too warm? Should I do this or do that? It keeps me up at night just thinking about it!

This is my artisian bread on the left and my kombucha on the right. I will be making this bread after I clean my kitchen and finish my coffee.
 I made chapstick this week. I was so easy. Coconut oil, shea butter and beeswax.

Viola!

Monday, April 9, 2012

Homemade Granola & Split Pea Soup

So I've already blogged once today, only I was signed in as Erin and accidentally posted it on his "Ecclesiastical Thought's" blog, lol about granola. We'll see if any of his seminary friends read his blog and are interested in granola. Also, it's a wasted effort on my part, boo! I got things to do!

Anyways, I will still tell you about the granola I made today. It is so good! I have been munching on it all day, hopefully there will be some left for Erin to try :)

I have really become obsessed with eating greek yoghurt, topped with honey and granola. Yum, yum, yum. However, all of those things are expensive :/ I'm pretty sure I won't be making my own greek yoghurt (maybe regular though!) or honey, so I will make my own granola then!

I already mentioned my girl Shaye from the Elliot Homestead blog, but this is her recipe and I followed it exactly. It cost me about $8 in ingredients that I bought in bulk from my natural foods co-op. It yielded roughly 8 cups of granola, holla! I usually spend about $4 for 2 cups :( The only downfall about this recipe is that it is not sprouted, but it is organic. So this girl is happy. Did I mention this takes about 10 minutes of active work and it bakes in 30 minutes? Sounds great to me.

Tray 1

Tray 2

Yum! It has oats, flax seed, dried cranberries, pumpkin seeds, buckwheat groats (what the heck are those??), coconut flakes, chopped pecans, and honey.

This was the state of my kitchen this morning, after I filled my dishwasher too! So many dishes from Easter and me hehe.

For Easter, I made a lot of food and took no pictures, boo. Here was the menu:

-French onion soup, topped with sliced baguettes and shredded Gruyere cheese
-Homemade soaked whole wheat biscuits
-Spiral sliced ham
-Scalloped potatoes
-Brussel Sprouts (they have such a bad reputation but are AMAZing)

After our guests left, Erin and I watched a movie. But really he watched it as I slept on the couch. It was a long day!

And for dinner tonight, I am making split pea soup! MMMM. Have you ever been to Anderson's Pea Soup in Santa Nella?  I love me some pea soup. So I'm making it tonight with the left over ham and ham bone. I soaked the split peas today for about 7 hours in some water with a little kefir. Now they are cookin away in the hot tub.

This is seriously my favorite pot ever. When the soup is done, I will take out the bone, use my immersion blender to blend the peas, shred the meat and add it back to the pot. Viola!

Wednesday, April 4, 2012

Hello April

It seems like I forgot about blogging in March. And in December, and November. But let's not let that get to us! I am a new woman. I feel like someone crazy has taken over. And I like it.

A few months ago, I bought the book Nourishing Traditions. I have several friends at my church who follow the book and cook the recipes inside. At first, I thought it was a great nutrition book and a new outlook on food, but wasn't about to prepare my food as the book suggests. It sounded complicated and time consuming. However, this my friends has changed. I love this idea of soaking my grains (rice, flour, beans, batters, etc), preparing my food properly so that it is best absorbed by my body, and enjoying the wholesome food I am eating.

I am becoming addicted to it actually. This week was the first of actually applying this. For example, on Saturday night, I knew that I wanted pancakes for Sunday breakfast. So, I got the whole wheat flour and soaked it with kefir ( an acidic median to break down the phytates in the wheat that our body can't naturally do on its own) overnight on Saturday. I made them Sunday morning and they were delicious. I also made my first soaked whole wheat bread and it is delicious! I got 3 loaves out of it. That recipe is here.

I am going to give a HUGE chunk of credit to my girl Shaye, who has the fabulous blog The Elliot Homestead, for inspiring this change in me. If you don't follow her blog, you should. She is funny and has wonderful recipes that are nutritious, budget friendly and made from scratch.

Some of my future aspirations include:

Getting my own grain mill
Sprouting and grinding my own flour
Brewing my own Kombucha (in the works)
Making all of our bread (sourdough, wheat, english muffins, biscuits, tortillas, etc.)
Soaking all of our beans and grains
Canning homegrown vegetables and fruit this summer
Making my own deodorant, chapstick, and whatever else I can
Find a local farmer where I can buy eggs and milk from, and a butcher where I can buy meat from
Get a dehydrator so I can sprout and dry granola, oats, wheat berries, and make yogurt
Sharing things with friends!

Some of my current projects in my new food freak journey are pictured here.


These are lentils that I started sprouting so that I could use them in lentil soup, which we enjoyed for dinner tonight, along with the soaked whole wheat bread. I soaked them overnight once, then for the last 2 days I rinsed them throughout the day until they grew sprouts that were 1/4 inch long. It worked!

This is my sourdough starter that I have going. It is very simple. I started with 2 cups of organic rye flour and 2 cups of warm water. For this next week, each day I stir in 1/2 cup of the rye flour and 1/2 cup of water and viola! Then I can make my own sourdough bread, tortillas, and whatever the heck I want. I'll share my starter with you if you want!


And this my friends, is the beginning of a great thing. Kombucha. Yep, that drink they sell in weird health food stores. The one that is raw, with live bacterial cultures in it and smells kind of like vinegar?? That's the one! And I am so excited to start making my own. If you want to learn about Kombucha, you can do that here. It is basically a fermented tea, filled with health benefits. I found myself a scoby, which is what is in the small mason jar. I found it at my local beer brewing supply store. And I bought a big glass iced tea jar to make it in and after its made, I can pour it out the spout! How nifty!

I plan on taking step by step pictures of my journey with this one, hehe, if we don't get taken over by the scoby growing madly in my pantry. I will keep you posted.

Alas, my sister graduated from cosmetology school! Yay Colleen! I just love her :)


Random things going on in our lives right now:
-Erin and I started going to yoga class together and we love it!
-I am working a lot more at Starbucks, raking in the dough!
-I am making huge messes in the kitchen
-We are getting our tax returns back and will be debt free by the end of this month!
-I am paying off my car soon, holla!
-We are currently on season 6 of watching Seinfeld and it has been such a fun journey watching it
-I am ready to plant our zucchini! We still have our tomato plant from last year that survived the winter and is currently still growing tomatoes, how crazy is that?!
-that's all, we aren't really that exciting. In fact, Erin and I are getting ready to play some yahtzee and probably watch some Seinfeld